Collection of assignments for the Computer Haptics course (Computer Science 599.86 at the University of Calgary) I took in winter 2018.
Sadly I no longer have access to the Novint Falcon haptic devices used in this course so I cannot take screenshots or record videos demoing the haptic components of these assignments. Plus haptics are something you just have to feel yourself so screenshots and videos wouldn’t do it justice anyway. Fortunately I was able to get my old code to run so I can at least show off the various scenes that had haptics implemented in them. Also you might notice that the haptic refresh rate is half of what it should be, this is likely due to my current dev environment since when I worked on them they all ran at around 1000 hz.
Source code is self-hosted on my home Git-Gogs server which is only accessible from my home network.
Force Field Rendering
Features
- Mathematically defined solids or repulsive force fields.
- Rendered using opaque materials.
- Haptic device would push you away from these objects upon contact.
- The further into the object you press the stronger the force to push you back.
- Mathematically defined magnets or attractive force fields.
- Rendered using transparent materials.
- Haptic device would pull you toward the center of these objects upon entering the field.
- The closer to the center the stronger the attraction.
- Had to tweak the effect a bit to maintain stability at the very center.
- Last scene is animated as hopefully shown with the two screenshots for that scene.
Screenshots
.png)
|
.png)
|
Repulsive force fields left. Attractive force fields right.
.png)
|
.png)
|
Animated scene.
Implementation Details
For the sphere I computed whether the avatar was in the sphere by checking whether it’s distance to the sphere’s origin was smaller than the sphere’s radius. If the avatar was in the sphere then a force would be applied. The direction of the force depends on the normal of the sphere at the point that the avatar is at.
For the cube I checked whether the avatar was in the cube, basically just by checking whether the avatar was within all the walls. Then if the avatar was in the cube I checked which axis of the avatar’s position was largest. The largest axis was used to determine the direction of the normal and thus the cube could not be rotated without modifying the algorithm. Then a force was applied in the direction of the normal computed using the above concept.
For the sphere magnet I used the same reasoning as for a regular sphere but negated the normal and used the smaller sphere to indicate when to stop using the sphereRadius-avatarDistanceSphereCenter and just use avatarDistanceSphereCenter. This solved the jerkiness that would otherwise be felt at the center of the singularity since it meant that the numbers for the force were increasing until the smaller sphere where they would start decreasing since the distance to the sphere’s center would be decreasing.
For the line I used the same reasoning as for the sphere magnet but ignored the y axis and used cylinders instead of spheres to render it to the screen.
Credits
Implicit Surfaces
Features
- Repulsive forces are defined by the normals of the implicit surfaces.
- Uses the god object algorithm to ensure that the user can’t push through the objects.
- Simulates friction by providing resistance to movement when pushing along the surface.
- Attempted to do the bonus which required multiple implicit surfaces to be joined together such that you could not push through where they met.
Screenshots
.png)
.png)
|
.png)
|
.png)
|
.png)
|
Friction Implementation
I check a flag for whether the cursor is moving or not. Then if it’s moving I check whether the distance from the interaction point to the ideal target point is less than the distance from the ideal target point to the kinetic friction cone minus a small epsilon, if so the moving flag is set to false. Otherwise I update the position to the edge of the kinetic friction cone. If the moving flag’s not set, then it gets set if the distance from the interaction point to the ideal target point is greater than the distance of the ideal target point to the edge of the static friction cone. The small epsilon is what keeps floating point errors from screwing with the kinetic friction cone.
Credits
- CHAI3D Haptics library.
- For my shape I used a tangle cube from Implicit Algebraic Surfaces
- Other implicit functions given to us in the assignment description.
Surface Textures
Features
- Uses textures for haptic applications.
- Roughness map for simulating fine surface details (surface friction).
- Height map for simulating course surface details (surface depth).
- Textures can be either images or procedurally defined in the application.
- World space management where as you get close to the edge of your workspace the entire world will move.
- Unfortunately, I cannot demo this as it requires a haptic device to move the scene.
Screenshots
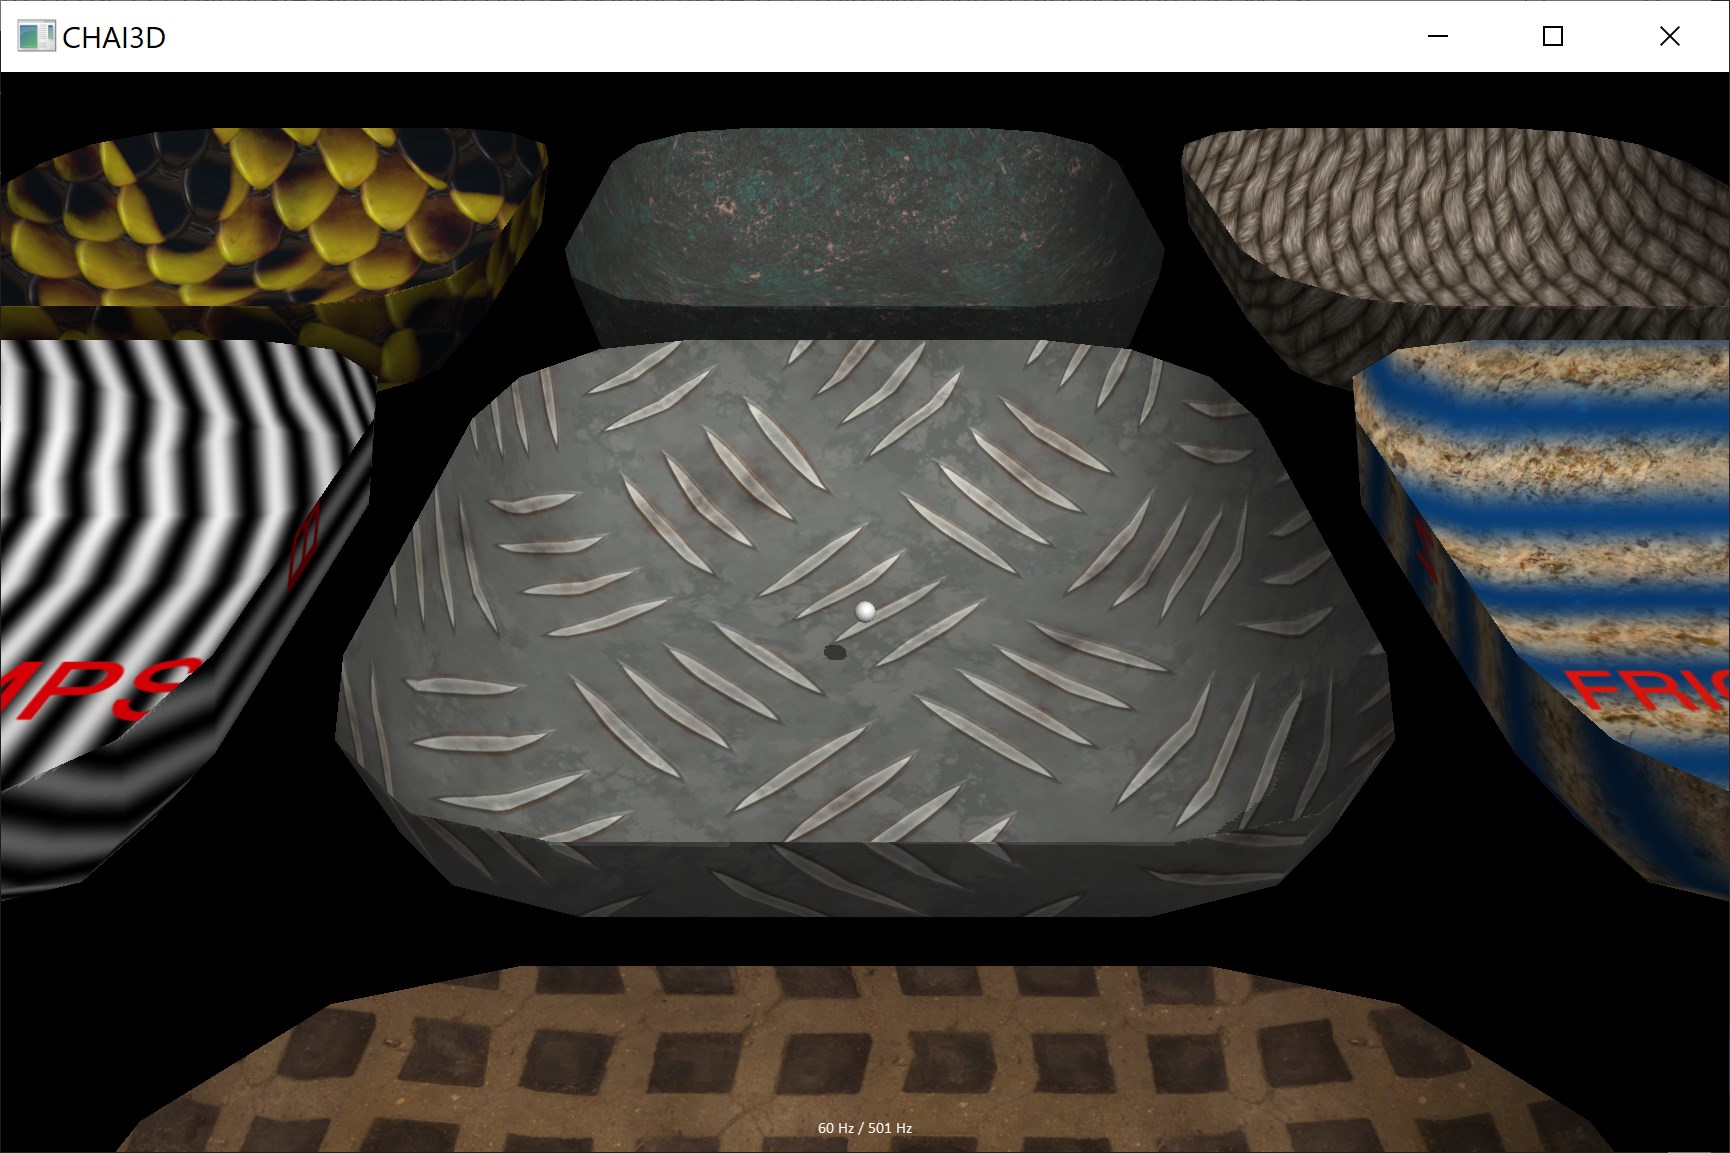 Default scene location.
Workspace Management
If the haptic cursor is at the edges of its space it will move the workspace. The advantage is that it’s pretty intuitive, doesn’t lose data (no scaling issues), allows for a nice movement control and was pretty easy to implement. I’ve also made it slightly faster the closer to the workspace edge the cursor is at but since I just divide it by the value at which it starts moving the effect is really minor. Essentially I just check whether the haptic cursor is past a certain value (in my case 0.025) and then if so it will move the camera along the axis that was past that.
Here’s the exact function that does this:
1
2
3
4
5
6
7
8
9
10
11
12
13
14
15
16
void moveView(cVector3d position) {
    double moveEpsilon = 0.00005;
    double moveBound = 0.025;
    cVector3d moveby = cVector3d(0, 0, 0);
    if (abs(position.x()) > moveBound) {
        moveby.x(moveEpsilon * (position.x() / moveBound));
    }
    if (abs(position.y()) > moveBound) {
        moveby.y(moveEpsilon * (position.y() / moveBound));
    }
    if (abs(position.z()) > moveBound) {
        moveby.z(moveEpsilon * (position.z() / moveBound));
    }
    tool->setLocalPos(tool->getLocalPos() + moveby);
    camera->setLocalPos(camera->getLocalPos() + moveby);
}
Credits
- CHAI3D Haptics library.
- The two custom materials I used from FreePBR were rock infused with copper and rough spaced tiles.
- Edited the roughness of the rough spaced tiles to have greater contrast for a nicer friction effect.
- All other materials provided to us with the assignment description.
Dynamics Simulation
Features
- Haptic interaction with dynamic objects.
- Point masses and springs. (Pendulums)
- Deformable 2D mesh with cross springs to increase stability.
- Attempted deformable 3D mesh which mostly works.
- Forgot I needed to include another dimension when computing distance in 3D as opposed to 2D. As such I foolishly reused my cross spring creation from the 2D mesh implementation and had massive instability when enabling cross springs on the 3D mesh.
- Cross springs can be disabled or enabled during runtime.
Screenshots
.png) Pendulums made out of point masses and springs. The masses are 0.2, 2, 0.5, 0.5 kg and springs are 400, 4000, 200, 200 N/m and 10, 100, 1, 25 Ns/m respectively.
Pendulums made out of point masses and springs. The masses are 0.2, 2, 0.5, 0.5 kg and springs are 400, 4000, 200, 200 N/m and 10, 100, 1, 25 Ns/m respectively.
.png)
|
.png)
|
Deformable 2D mesh. Left shows cross springs disabled. Right shows cross springs enabled.
.png)
|
.png)
|
Deformable 3D mesh. Left shows cross springs disabled. Right shows cross springs enabled.
Cross Springs
Main thing to note here is that cross springs help with the overall stability of the deformable mesh by ensuring that the mesh will always return to it’s original configuration. This is cause without cross springs you can deform the mesh in such a way that the springs become parallel to each other and you effectively lose a dimension. By adding cross springs, you can prevent that from every happening. Alternatively each set of springs could have an angle spring that does the same job of a cross spring but should end up using fewer springs. Since cross springs seemed more intuitive to me, I implemented them instead of angle springs.